AI editing: what changes between the generated video and the finished ad
See, scene by scene, what AvataReel's AI Editing does on its own: hook, captions, music and product scenes. And how to adjust everything in the editor, with no export fees.
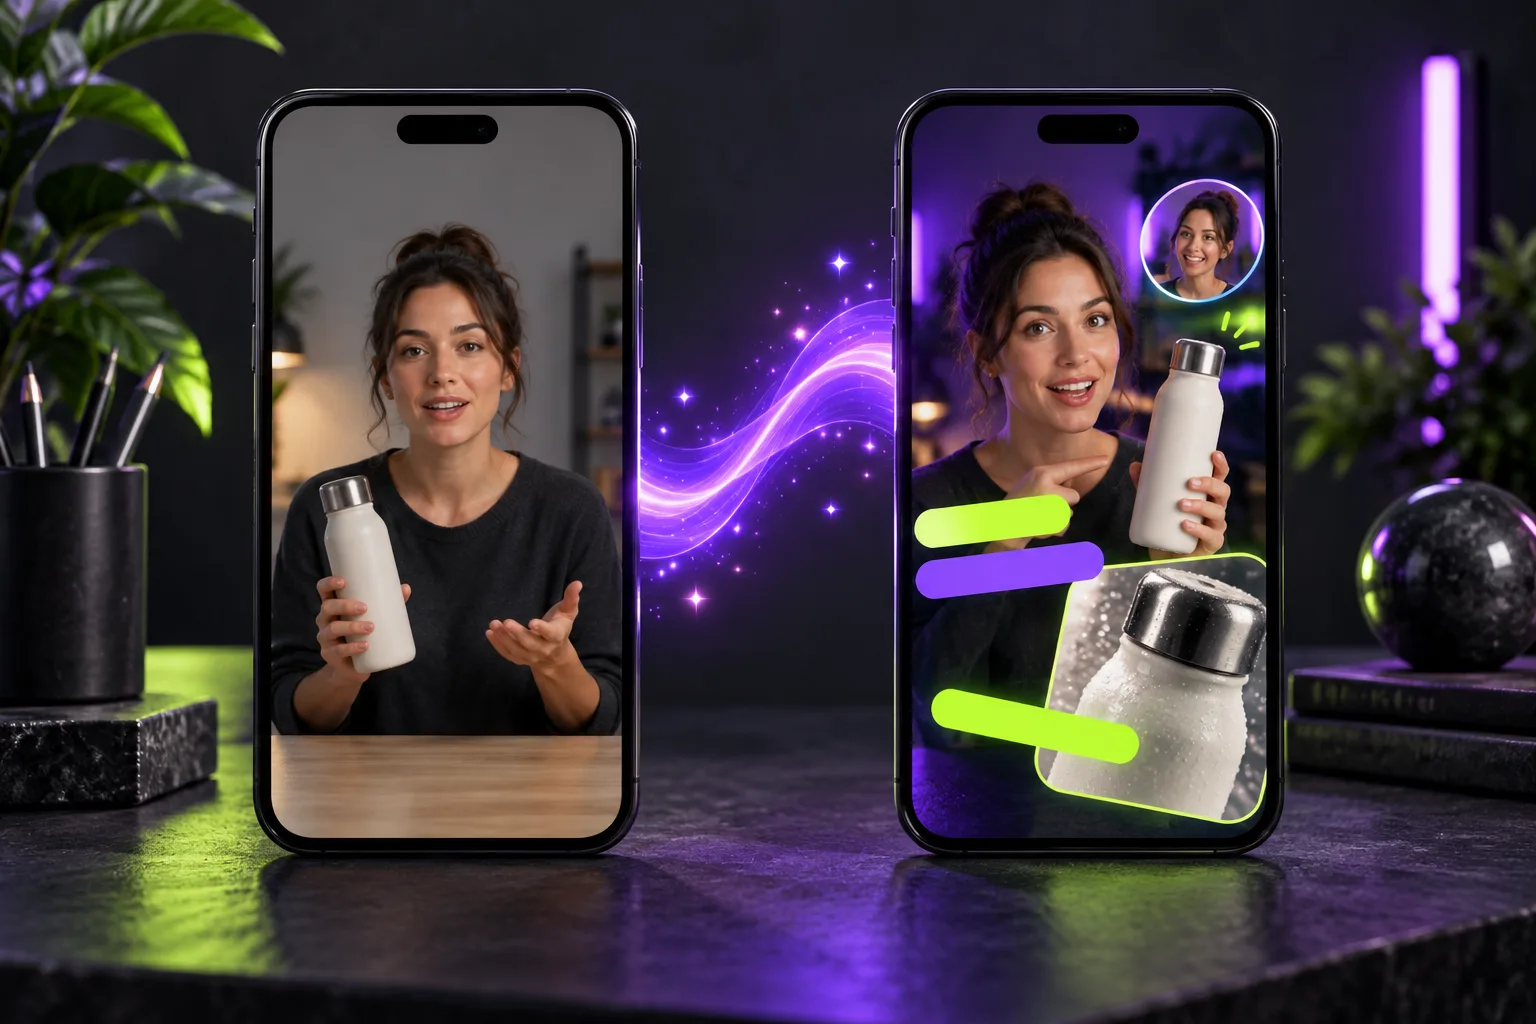
An AI-generated video solves the hard part: an avatar speaking your script, with voice and mouth in sync. But an ad needs more. It has to hold someone scrolling the feed in the first second, be understood without sound and show the product.
AI Editing does that second part. When the video with a product is ready, it builds an ad version on its own and exports the first version at no cost. See the difference in the same video:
Below, each change explained and how to adjust it.
What the AI does on its own
A title on the hook
In the first seconds, a large title appears over the avatar, with up to five words. The AI highlights up to three of them in the accent color. In the example: "The thermal bottle that changed everything", with "thermal" and "bottle" highlighted.
The title sums up the video's promise for people still deciding whether to keep watching. For tips on writing good hooks, see the guide on hooks without clickbait.
Captions written from the script
Many people watch without sound. Animated captions follow the speech word by word. Because they come from the script, and not from a transcription of the audio, product and brand names show up spelled the right way.
To understand what makes a caption easy to read on a phone, read captions in vertical video.
Product scenes between the lines
The product photo comes in as a scene while the avatar speaks, and the demo video, if you included one, also becomes a scene. During these scenes, the avatar sits in a circle in the corner of the screen, and the caption keeps going. Viewers do not lose the thread of the conversation.
Music and transitions
The AI adds background music and sound effects at scene changes.
Closing with a call to action
The video ends with a closing screen: product name, a sentence and the call to action, such as "Order yours today".
Everything on one timeline
Open the editor from the video page, under Open editor. The screen has three areas: the scene list on the left, the preview in the center and the adjustments on the right. The timeline sits at the bottom.
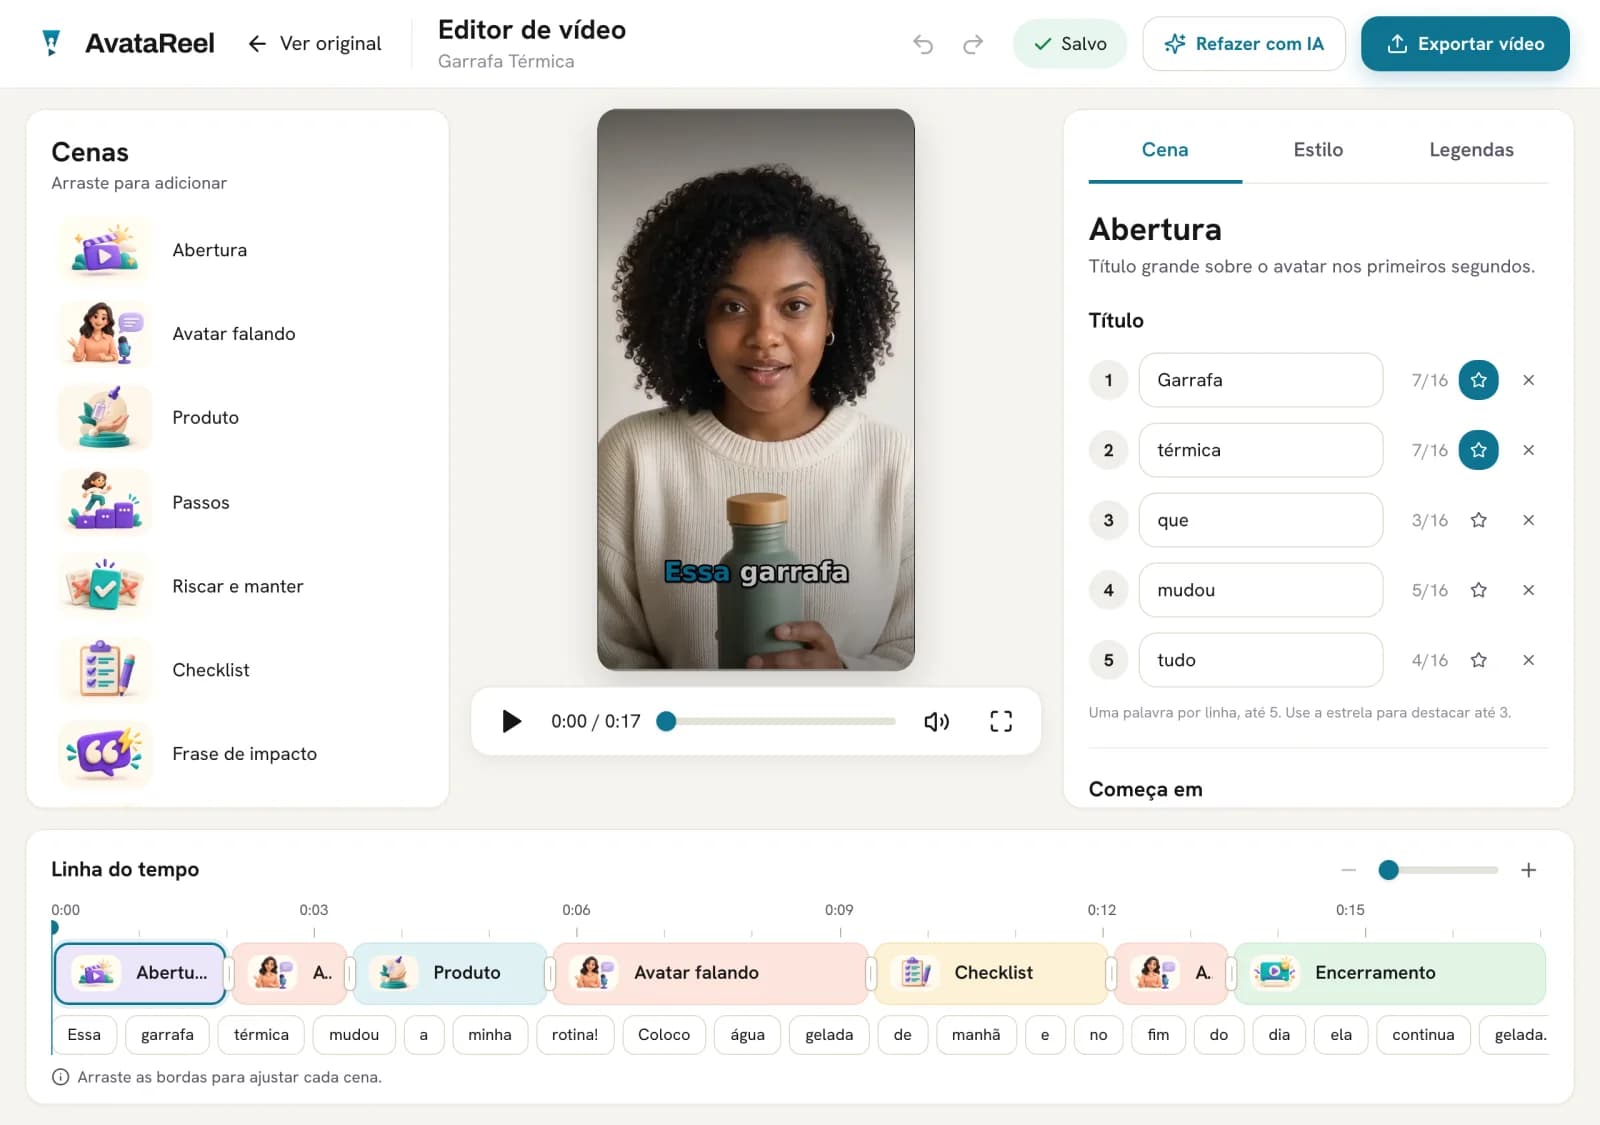
A scene starts on a word of the speech, not at a fixed second. That is why scenes stay in the right place even when the voice changes pace.
You can drag new scenes from the list onto the timeline:
| Scene | What it is for |
|---|---|
| Opening | Large title in the first seconds |
| Talking avatar | The avatar full screen |
| Product | Product photo or video, with the avatar in the circle |
| Checklist | Up to 4 benefits with check marks |
| Steps | Up to 3 usage steps |
| Cross out and keep | Cross out what does not matter and keep what does |
| Punchline | A few words in focus |
| Closing | Brand, sentence and call to action |
Change the style in a few taps
In the Style tab, you choose the brand color, turn on the logo in the closing, and change the caption style and the music.
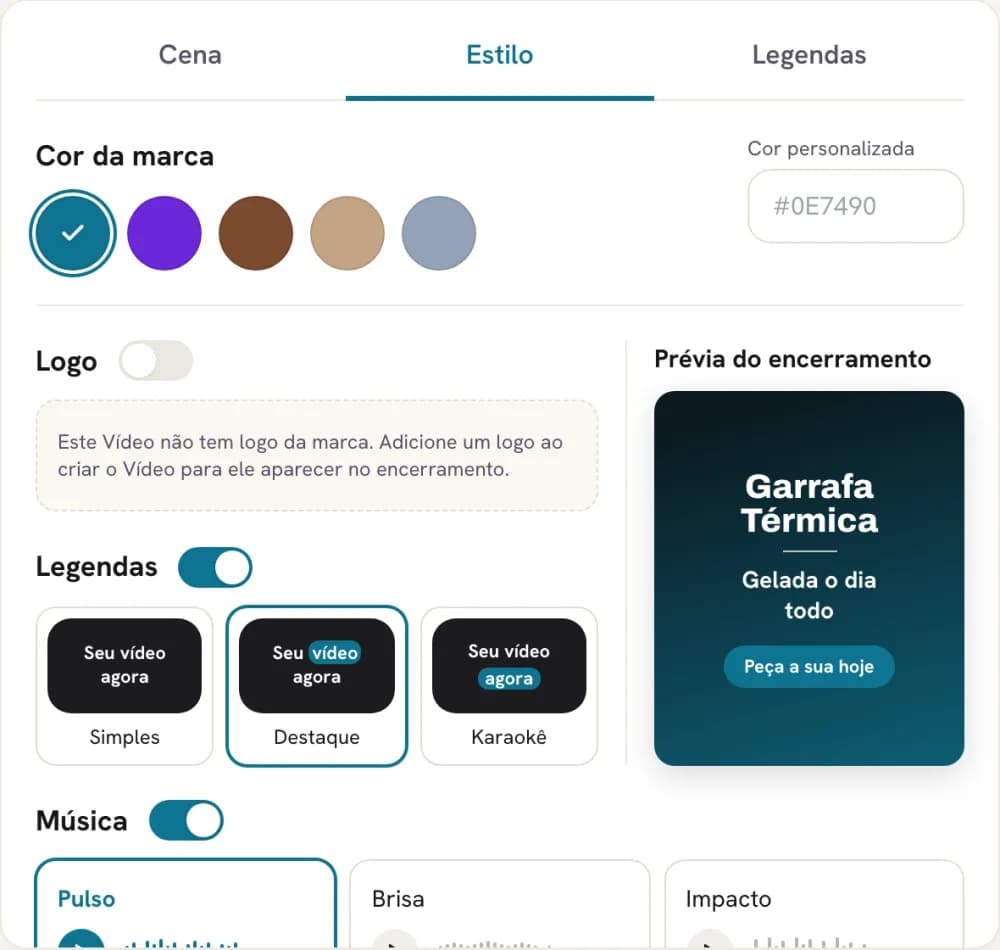
The available options:
- 8 visual templates: Pulse, Clean, Neon, Pop, Luxury, Retro, Newspaper and Notebook.
- 3 caption styles: Simple, Highlight and Karaoke. You can also turn captions off.
- 3 music tracks: Pulse, Breeze and Impact, or none.
- Brand color and logo, to keep the same identity across all videos.
If you make several videos a week, pick a template and a color and repeat. The guide on visual identity for a series helps you decide what to keep fixed.
Fix a word without redoing the video
Did a caption come out wrong? Use Fix captions in the editor and change the text. The audio does not change; only what appears written.
Ask the AI for another version
If the editing is not how you like it, tap Redo with AI. In the "What do you want different?" field, write in one sentence what to change. For example: "show the product earlier" or "swap the checklist for usage steps".
Changes are saved automatically, and you can undo and redo.
Export in three formats
Tap Export video and choose:
- Vertical, for Reels, TikTok and Shorts;
- Square, for the feed;
- Horizontal, for YouTube and websites.
You can leave the page while the export runs. The MP4 shows up on the video page when it is ready.
When automatic editing does not run
Editing starts on its own only when three conditions come together: the video has a product photo, it was generated on Premium or Economy and it is not part of a batch. Outside of that, open AI Editing on the video page and create the edit whenever you want.
Have not made your video with a product yet? The step-by-step with screenshots shows each screen.
Generate the video with a product and adjust the editing without paying for export.
Create video with product →Frequently asked questions
Does AI Editing replace the original video?
No. The original stays saved. The edited version is a separate file, and you download whichever you prefer.
When does the editing start on its own?
When a video with a product photo is ready, on Premium or Economy. Videos made in a batch do not get automatic editing.
Can I ask the AI to redo the editing?
Yes. In the editor, use Redo with AI and, if you want, write what you want different.
How much does exporting cost?
Nothing. Exports from the editor cost 0 credits, in vertical, square or horizontal.
Upload a photo, record your voice and type the script. Your first avatar is free.
Create my free avatar →