AI lip sync: how a photo becomes a talking avatar (real example)
See what happens between the photo and the video: photo check, voice, lip sync and 9:16 delivery. With a real example, the cost in credits and what changes the result.
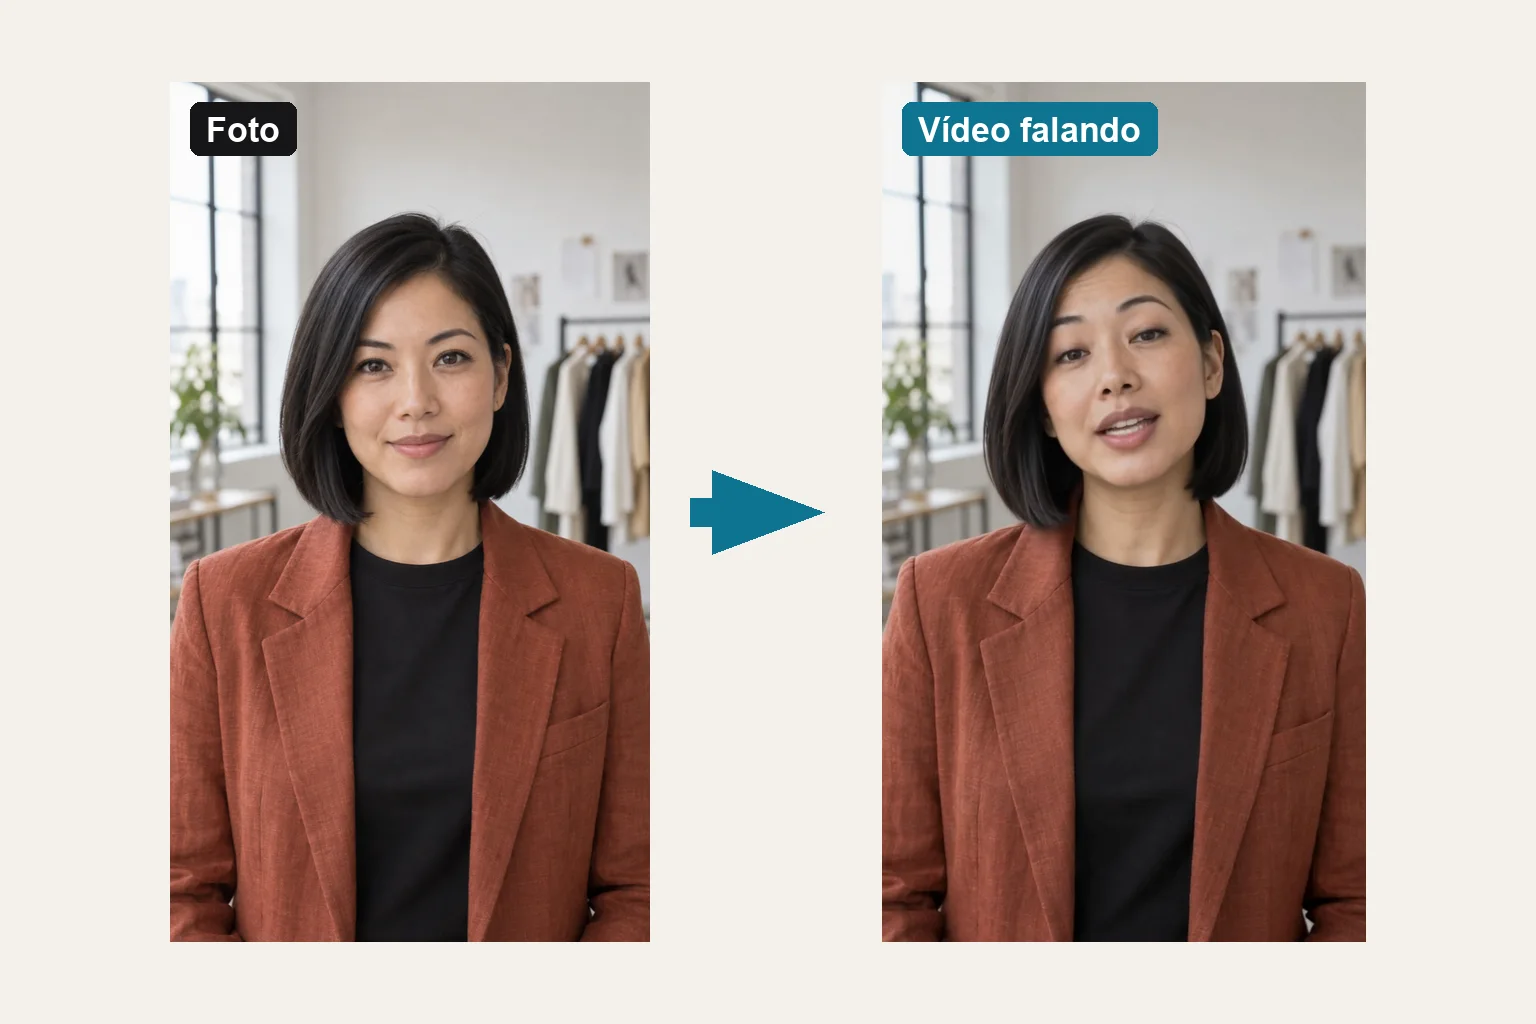
For a photo to become a talking avatar, four things have to go right: the photo, the voice, the lip sync and the delivery. In this article we show each step with a real example. Helena, one of the avatars in the catalog, was generated from a single photo and a text script.

The example: what went in and what came out
| Input | 1 photo (768×1376 px) and 1 script of 229 characters |
| Voice | Ready-made catalog voice, in Brazilian Portuguese |
| Output | Vertical 9:16 MP4, 13 seconds, 25 frames per second |
| Quality | Premium (1080×1920). See the Economy version in Premium or Economy |
| Cost by the current table | 10 credits on Premium, 6 on Economy |
| Editing | None. The video above came straight out of generation, with no captions |
The script was this (the example video is in Portuguese; this is a translation):
"Hi, I'm Helena. This video came from a single photo and a text script. The voice, the mouth and the expressions were generated by artificial intelligence. Look closely at the details of the face: can you tell the difference between the qualities?"
Step 1: the photo is checked before it becomes an avatar
When you create an avatar with your photo, AvataReel checks the image in two phases.
In the browser, before upload:
- The file must be JPG, PNG or WebP, up to 10 MB. HEIC photos, the iPhone default, do not open.
- The shorter side must be at least 480 px.
- The photo cannot be too dark.
After upload, on the server:
| What we check | Why it matters |
|---|---|
| One face only, of a real person | Drawings, cartoons or several people block creation |
| Face size | A small face, or one too close to the camera, loses mouth detail |
| Sharpness | A shaky photo becomes a blurry video |
| Light on the face | A dark or blown-out face loses skin texture |
| Eyes open and looking at the lens | The model animates from that gaze |
| Head straight | A face turned more than 20° distorts the mouth while speaking |
| Hand on the face and sunglasses | They hide the area the model needs to move |
If the photo has a problem that does not block creation, such as low light, you see the warning "The photo quality is poor" and can choose Use another photo or Create anyway. A missing face, several people and illustrations always block.
The rule of thumb: a real photo, facing the light, from the top of the head to the chest, at arm's length. The full step-by-step is in How to create a talking avatar from a photo.
Step 2: the voice
You have two options when creating the avatar:
- Ready-made voice: choose among the catalog voices. You can listen to a sample of each.
- My voice: record or upload at least 10 seconds. The bar marks 45 seconds as enough and stops at 90.
For your own voice, the recording is also checked. If there is background noise, distortion, muffled sound, long silences or words that are hard to understand, AvataReel asks for a new recording and tells you why. In the meantime, the avatar already creates videos with a voice similar to yours.
Tips for a good recording:
- Record in a quiet place, with no TV, fan or street noise in the background.
- Hold the phone about a hand's width from your mouth, without a Bluetooth headset.
- Speak as you do in your videos, without rushing.
More details about voices in TTS voices for talking avatars.
Step 3: the script becomes speech
In the video creator, you write the lines. The text is converted to audio in the avatar's voice. Punctuation counts: a comma creates a short pause, a period creates a longer one.
The length comes from the text. A good estimate is 15 characters per second. The 229 characters of the example became 13 seconds of speech. If you do not know what to write, use Help me write and choose between giving a tip, showing a product or making an invitation.
Step 4: lip sync, frame by frame
This is where AvataReel Motion comes in, our video model tuned for avatars and product demos. It receives the photo and the audio and generates the whole video, frame by frame, 25 times per second.
The model does not just cut out the mouth. It generates the entire face in motion:
- Mouth and jaw follow the syllables of the audio and close during pauses.
- Blinks and eyebrows show up naturally during speech.
- The head makes small movements without leaving the frame.
- Identity, clothing, background and light are preserved from the original photo.
Each generated segment holds up to 15 seconds of speech. Longer videos are generated in more than one segment and joined, up to the 90-second limit.
Step 5: delivery
The video comes out as an MP4, vertical 9:16:
| Quality | Delivered size |
|---|---|
| Economy | 720×1280 (720p) |
| Premium | 1080×1920 (1080p) |
The final size comes from an upscale done at the end. It puts the video in the standard size for social networks, but it does not create new detail. The detail comes from the resolution at which the model generates the video, higher on Premium. The difference shows side by side in Premium or Economy.
Captions are on by default and you can turn them off before generating. Videos have no watermark. Once the video is ready, AI Editing adds a title, animated captions and music at no extra cost.
Your first avatar from your photo is free. Videos use credits, with packs from $9 by card in USD.
Create my avatar →What changes the result most
In order of impact, from what we see in generated videos:
- The photo. A sharp, front-facing face with soft light matters most. No video quality can fix a shaky photo.
- The voice. A clean recording produces a more precise mouth, because the model follows the audio.
- The script. Short, spoken sentences sound more natural than text written to be read.
- The quality. Premium preserves more skin texture, eyes and teeth. Economy costs less and works well on a phone screen.
What a talking avatar does not do
- It does not guarantee specific gestures, such as pointing or picking up an object. To show a product, use the Product demo model. See how to create a video with a product demo.
- It does not change the photo's background on its own. To change the setting or clothing, use Scene and product or Outfit in the creator.
- It does not create an avatar of someone else without permission. At creation, you confirm that you have the right to use the image and the voice.
Start now
Create your account, upload your photo or pick an avatar from the catalog and generate your first video. To understand the concept first, read What is an AI talking avatar.
Frequently asked questions
What is AI lip sync?
It is the match between the mouth and the speech, generated by an AI model. In a talking avatar, the model receives the photo and the audio and creates a video in which the mouth follows every syllable.
Do I need a video or just a photo?
Just a photo. The example in this article used a single photo and a text script.
How much did the example video cost?
The video has 13 seconds of speech. By the current table, it costs 10 credits on Premium and 6 on Economy. The exact amount shows on the confirmation screen before you generate.
Can I use my own voice?
Yes. When creating the avatar, choose My voice and record or upload at least 10 seconds. Recording between 45 and 90 seconds in a quiet place makes the voice sound closer to yours.
What is the maximum length of a talking avatar video?
Up to 90 seconds of speech per video, on both qualities.
Upload a photo, record your voice and type the script. Your first avatar is free.
Create my free avatar →